Wednesday, March 31, 2010

Upcoming Scrapbooking Classes

Showcase your Easter celebration on one (or both) of these bright spring layouts!
Class will be held on Thursday, April 8th

6:00 to 9:00 p.m.
Sign up at our Rexburg store to reserve your spot.


by Kathy


by Stephanie

Friday, March 26, 2010

Easter Make and Take

Join us in our Rexburg store tomorrow (Saturday the 27th) for this simple Make and Take! Candi will be here from 12:00 to 3:00 p.m. to show you how easy it is to use vinyl in a personal die cut machine. In no time at all, you can make your own darling Easter decoration. There will be a small charge for the frame. Hope to see you there!


Thursday, March 25, 2010

Flower Power

Celebrate Spring with our "Flower Power" Card Class!

Come to our Rexburg store and create these four beautiful cards for only $5.

Although card class is not until April 15th, we wanted to give you a peek of what's in store. Space is limited, and our last few classes have sold out! So if you would like to attend, please sign up early.


See you there!

Wednesday, March 24, 2010

Class Reminder

Don't forget about our Scrapbooking classes held tomorrow night in our Rexburg store. Come learn unique ways to use stencils and masks. Class goes from 6:00 to 9:00 p.m. See you there!

(For more details, click here).

by Kathy


by Stephanie

Tuesday, March 23, 2010

Calendar Kit of the Month

Announcing our newest Calendar Kit of the Month!

Showcase your favorite photo on this beautiful spring layout designed by Tara Lehmann. Place it inside your calendar shadow box frame for the month of April. When the month is over, you can easily transfer it to your scrapbook.

The detail on this kit is absolutely amazing! All the stamping and punching have already been done for you. All you need to do is assemble the pieces. There are a limited number of these kits available, so get yours in our Rexburg store while you can. At only $4.99, they will fly off the shelf!


Monday, March 22, 2010

"Brothers" Mini Album


Check out this darling mini album created by Maureen.

She started with a blank wooden book from Kaisercraft. I love how every page is different and layered so you get a peek of all of them when the book is shut.

She used the cute robot paper from My Mind's Eye which is perfect for any boy project.

Since the pages are made of wood, try cutting the prongs off the backs of the brads and attaching them with glue dots instead.


Mini albums are so easy to put together when you use a paper collection that comes complete with matching embellishments such as chipboard, brads, ribbon, and die cuts.

For more great ideas featuring this Kaisercraft mini album, visit their website here.

Saturday, March 20, 2010

2nd Saturday Recap


This month's assignment is to use stencils on your project.

In the above layout "Pebbles" brand stencils and chalks were used to create the tulips. Each tulip set was cut out and placed randomly throughout the layout, creating a dimensional effect. These stencils can be used to create backgrounds as well. Instead of using distressing ink, chalk was used to shade the edges of each scalloped paper.


Here, a doodling stencil was used to create the scroll work that adorns this layout, giving the design a little something extra.


In this layout, "Bazzill" stitching stencils were used to make a pattern that was then stitched with embroidery floss to create this elegant look. Be sure to check out this week's scrapbooking class by Kathy to see another way of using these stencils.
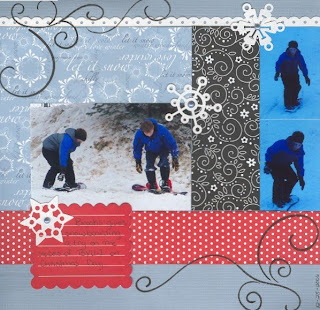


Once again the doodling stencils were used to create the embellished flurries. I have found that the "Zig Memory Stystem" dual-tip markers work great for this. These markers have a fine tip on one end and a thicker tip on the other, allowing you to get the effect you desire. Remember that you can use chalks and inks with these stencils as well.


In this layout designed by Stephanie, she has used several different stitching stencils to add interest and texture to some of the sun's light rays.

This week at her scrapbook class she will show you how to use the positive portion of a diecut or a masking stencil to get another interesting design. You can check it out here.


With so many die cutting machines available today many of us have forgotten about the stencils we used several years ago to scrapbook with. They still have value, so dust them off and put them to work! In this layout, those stencils were used to make the stars.

Have fun with your assignment this month and we look forward to seeing what genius ideas you bring back to share with us!

Candi