Showing posts with label Frames. Show all posts

Wednesday, June 30, 2010

New Imaginisce Part 1


New in the store (just in time for that summer vacation) is the charming "Scooter's Vacation" collection by Imaginisce. Although one side of these papers has a definite travel theme, the other side is generic enough to use for just about anything.

There are a variety of double-sided papers available, giving you more bang for your buck:


These cute 3-D layered stickers can be used for any occasion:


Don't miss out on one of the most popular embellishments... coordinating layered flowers:
These mirrored, dimensional stickers give a fun and unique look to your project:


Remember to pick up some matching Scooter ribbon:
Layered 3-D Sticker Stackers are great for cards, layouts, and mini albums:

And last but not least are a variety of coordinating clear acrylic stamps:
Here's a look at some fun projects created with a little help from Scooter:
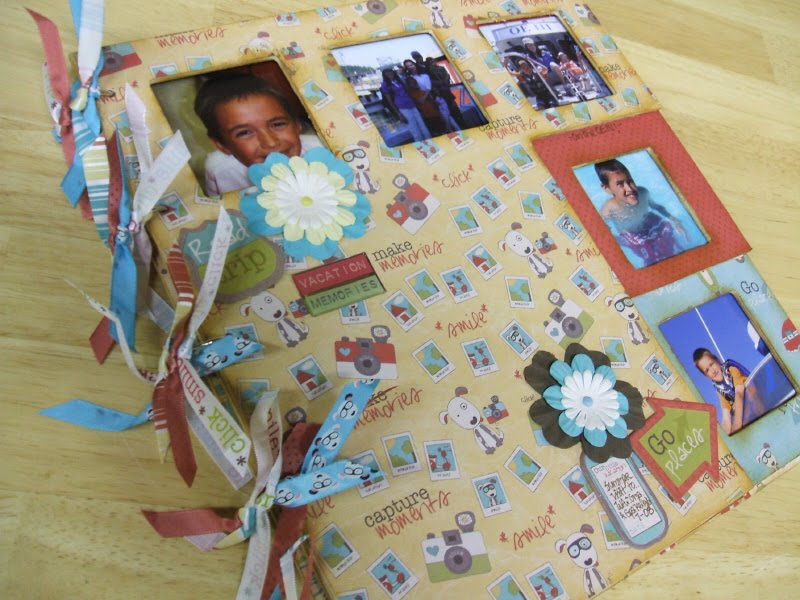

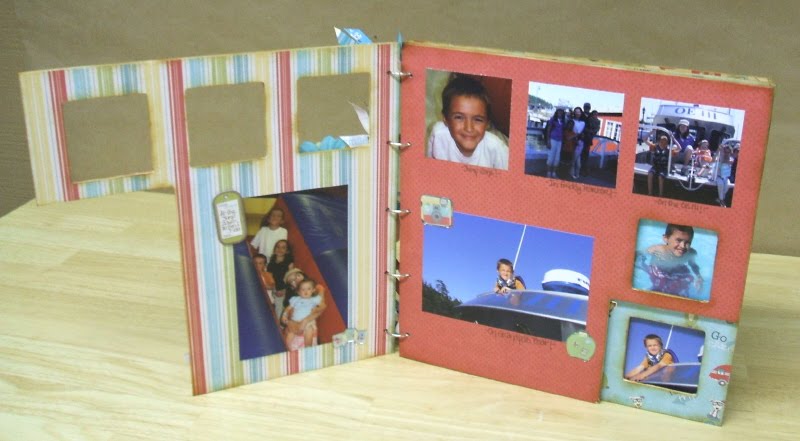
Kathy started with a wooden album by KaiserCraft:She used Mod Podge to apply the paper to the wood surface. After it was dry, she cut out the openings using a craft knife.


Create a cluster of embellishments with a mixture of products:


A plain 12x12 wooden frame was altered into an eye-catching display:


Don't be afraid to super-size your creativity. Leticia created this family photo collage using a 16x20 frame:

Notice the wave border punch she used to accent her water theme?


As you can see, there are so many possibilities when creating with this bright and fun collection from Imaginisce. Check out their idea gallery for a ton (yes, a ton!) of inspiration!

Friday, March 26, 2010

Easter Make and Take

Join us in our Rexburg store tomorrow (Saturday the 27th) for this simple Make and Take! Candi will be here from 12:00 to 3:00 p.m. to show you how easy it is to use vinyl in a personal die cut machine. In no time at all, you can make your own darling Easter decoration. There will be a small charge for the frame. Hope to see you there!


Wednesday, March 10, 2010

Floating Frame Project

This beautiful project, designed by Maureen Wilson, features photos, patterned papers, metal embellishments, and fabric.

This frame has four layers of glass. The first is a protective layer, the second has photos, the third has embellishments, and the fourth has fabric squares. This close up shot might give you a better idea:

To make one of your own, follow these simple steps:

  1. If you want to make a grid like the one shown, cut all your photos, papers, and fabrics to 2 inch squares (or use a 2 inch punch).
  2. Next remove the layers of glass from the frame.
  3. Use a dry erase marker to draw a grid on one sheet of glass. Then layer a sheet of glass on top of it so it’s easy to get perfect placement for all your squares. Attach your photos with glue dots.
  4. Repeat for each layer.
  5. When you’re finished, wash the marker off and use that sheet for the top protective layer.
This floating frame makes an eye catching display and is a beautiful way to showcase your favorite photos.

Wednesday, June 10, 2009

Father's Day Gift Idea

Wondering what to give Dad for his special day? How about creating a personalized gift that he is sure to remember! Choose from our large selection of frames. Add some patterned paper, accents, a favorite photo, and a special thought. This unique gift will be a treasure for many years to come.


Saturday, March 7, 2009

"2 for..." Frames

Do you have photos or artwork stored away just waiting for a frame? If so, then now is the time to come to Porter's and choose from our wide selection of "2 for..." frames. These great frames come in many colors and sizes and the price is right! Create the perfect finishing touch for that special piece of art or that treasured photograph!


Tuesday, February 24, 2009

Barnwood Frame Projects

We have a large variety of barn wood frames in stock and lots of ideas you can use them for. Here are just a few projects you could create:


First, choose a barn wood frame.

Then choose some fabric, ribbon, and metal embellishments.


This ribbon board was created by covering a piece of foam or mat board with a thin layer of quilt batting and then fabric. Next, place strips of ribbons across the board and attach brads where the rows intersect. Attach some metal stars across the top and metal star hooks along the bottom.


For this project, cover a piece of mat board with fabric and attach the large star hooks with screws . Cut the prongs off two large brads and glue them over the heads of the screws. Finish with a small barn wood frame.


To complete the ensemble, simply tie a torn strip of matching fabric around a piece of cork board and frame it. Quick and easy!

Saturday, November 1, 2008

New Webster's Pages in Scrapbooking

We have just received this beautiful new line from Webster's Pages featuring double-sided papers, message centers, calendar pages, and journaling cards. With this collection, you can create beautiful holiday gifts such as shadow boxes, calendars, and brag books.


Choose from our selection of shadow boxes to frame one of your layouts. This paper goes beautifully with heritage photos as well as more modern ones. What a great gift this would make for grandparents!


There are many journaling-type papers in this collection. They are great to use as backgrounds for a layout or a card. You could also use them to record stories in your family history scrapbook.

The calendar pages can be used for just that...creating a calendar. Or you can use them as a background for a layout.


For more inspiration using this product, check out the Webster's Pages Gallery.

Thursday, July 3, 2008

Project of the Week - Family Frames

Display your family name in this Project of the Week. Combine contemporary frames and vinyl to create a stylish work of art.

Materials:
_One 12 x 36 Frame. Several styles to choose from.
_One pre-cut family mat. Different number of letter openings available.
_Background color matting. Available in a variety of colors.
_Vinyl letters to spell your name and a meaningful saying. Letters sold individually.

Instructions:
First select your frame and letters. Layout how you would like the finished project to look. Open the frame and clean the glass. Now is the time to place any background images in the mat. Suggested images include temples, family photos, and heirlooms; but you can choose anything you feel appropriate.

Next comes the application of the vinyl. Place the frame with the glass face down. Place the white top mat in the frame. Use the openings as a reference for the placement of your letters. Place your vinyl letters down on the glass. (Make sure that you have the name spelled out correctly. Your looking at the word from the back so it should be read right to left.)

With the application of the letters complete, adhere the background matting to the top mat. Check to make sure that the frame is still clean then attach the backing cardboard. Add the hanging hardware and clean the outside of the glass.

If you have selected a vinyl saying to accompany your name this can be place on the front of the glass or on the front of the top mat.

Hang your picture and admire the piece of art you've created.