Wednesday, March 31, 2010

Upcoming Scrapbooking Classes

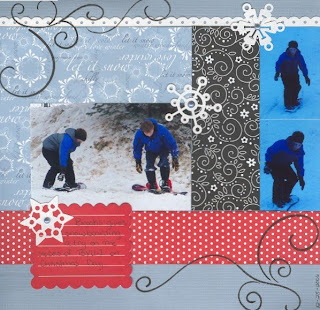
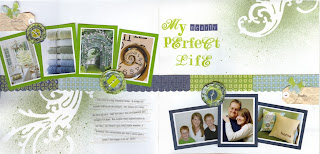
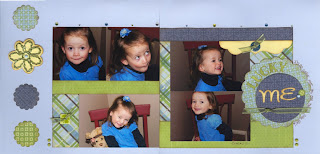
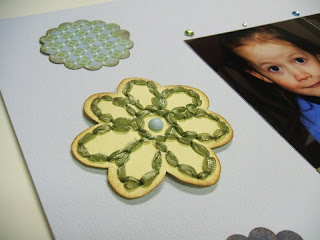
Showcase your Easter celebration on one (or both) of these bright spring layouts!
Class will be held on Thursday, April 8th

6:00 to 9:00 p.m.
Sign up at our Rexburg store to reserve your spot.


by Kathy


by Stephanie

Friday, March 26, 2010

Easter Make and Take

Join us in our Rexburg store tomorrow (Saturday the 27th) for this simple Make and Take! Candi will be here from 12:00 to 3:00 p.m. to show you how easy it is to use vinyl in a personal die cut machine. In no time at all, you can make your own darling Easter decoration. There will be a small charge for the frame. Hope to see you there!


Thursday, March 25, 2010

Flower Power

Celebrate Spring with our "Flower Power" Card Class!

Come to our Rexburg store and create these four beautiful cards for only $5.

Although card class is not until April 15th, we wanted to give you a peek of what's in store. Space is limited, and our last few classes have sold out! So if you would like to attend, please sign up early.


See you there!

Wednesday, March 24, 2010

Class Reminder

Don't forget about our Scrapbooking classes held tomorrow night in our Rexburg store. Come learn unique ways to use stencils and masks. Class goes from 6:00 to 9:00 p.m. See you there!

(For more details, click here).

by Kathy


by Stephanie

Tuesday, March 23, 2010

Calendar Kit of the Month

Announcing our newest Calendar Kit of the Month!

Showcase your favorite photo on this beautiful spring layout designed by Tara Lehmann. Place it inside your calendar shadow box frame for the month of April. When the month is over, you can easily transfer it to your scrapbook.

The detail on this kit is absolutely amazing! All the stamping and punching have already been done for you. All you need to do is assemble the pieces. There are a limited number of these kits available, so get yours in our Rexburg store while you can. At only $4.99, they will fly off the shelf!


Monday, March 22, 2010

"Brothers" Mini Album


Check out this darling mini album created by Maureen.

She started with a blank wooden book from Kaisercraft. I love how every page is different and layered so you get a peek of all of them when the book is shut.

She used the cute robot paper from My Mind's Eye which is perfect for any boy project.

Since the pages are made of wood, try cutting the prongs off the backs of the brads and attaching them with glue dots instead.


Mini albums are so easy to put together when you use a paper collection that comes complete with matching embellishments such as chipboard, brads, ribbon, and die cuts.

For more great ideas featuring this Kaisercraft mini album, visit their website here.

Saturday, March 20, 2010

2nd Saturday Recap


This month's assignment is to use stencils on your project.

In the above layout "Pebbles" brand stencils and chalks were used to create the tulips. Each tulip set was cut out and placed randomly throughout the layout, creating a dimensional effect. These stencils can be used to create backgrounds as well. Instead of using distressing ink, chalk was used to shade the edges of each scalloped paper.


Here, a doodling stencil was used to create the scroll work that adorns this layout, giving the design a little something extra.


In this layout, "Bazzill" stitching stencils were used to make a pattern that was then stitched with embroidery floss to create this elegant look. Be sure to check out this week's scrapbooking class by Kathy to see another way of using these stencils.


Once again the doodling stencils were used to create the embellished flurries. I have found that the "Zig Memory Stystem" dual-tip markers work great for this. These markers have a fine tip on one end and a thicker tip on the other, allowing you to get the effect you desire. Remember that you can use chalks and inks with these stencils as well.


In this layout designed by Stephanie, she has used several different stitching stencils to add interest and texture to some of the sun's light rays.

This week at her scrapbook class she will show you how to use the positive portion of a diecut or a masking stencil to get another interesting design. You can check it out here.


With so many die cutting machines available today many of us have forgotten about the stencils we used several years ago to scrapbook with. They still have value, so dust them off and put them to work! In this layout, those stencils were used to make the stars.

Have fun with your assignment this month and we look forward to seeing what genius ideas you bring back to share with us!

Candi

Friday, March 19, 2010

New "Busy Bee" Collection from Adornit

Carolee's Creations has some fresh new lines out this spring. Here is a look at "Busy Bee."

The papers are a nice cardstock weight and coordinate so well together. We also have some accent sticker sheets in stock, so check them out!


Here's some layouts designed by Kathy:

Place border stickers, ribbon, and paper strips across the top and bottom of your layout for a cute page border.


Don't let big patterns on paper scare you. Incorporate them into your page design.


We also received a shipment of alphabets and other clear sticker designs to accent your project.
Check out the blog at Adornit for fun challenges and inspiration.

Wednesday, March 17, 2010

Upcoming Scrapbooking Classes

Our next scrapbooking class will be held Thursday, March 25th, from 6:00-9:00 p.m. at our Rexburg store. Experiment with different techniques for using masks and templates. Here's a look at what's in store:

In Stephanie's class you will learn how to alter plain white cardstock into your own unique background paper using Tim Holtz masks and Glimmer Mist. It's easier than you might think!


Here's a close up view of the reverse stencil technique a mask creates.


Find out how easy these shabby flowers are to create!


Kathy tried a new twist with an old technique by combining ribbon and Bazzill Stitching Templates:


Here's a close up of her beautifully stitched flower.


The title is die cut, so you can easily make it your own!

Sign up at the Rexburg store to reserve your spot. First come, first serve!

Tuesday, March 16, 2010

Scrappy Home Decor Make and Take

We are even celebrating Quilt Week in our Scrapbooking Department!
Join us this Saturday, March 20th, for a Home Decor Make and Take.
For a minimal class fee you can create this "Heartstrings" shadow box display in a matter of minutes. Come anytime between 11:30 a.m. and 1:30 p.m. Class is available at both store locations.


Monday, March 15, 2010

Card Class Reminder

It's time for Card Class this Thursday, March 18th, from 6:00 to 9:00 p.m. in our Rexburg store. For only $5 you can make all four of these wonderful springtime cards! Learn how to use acrylic accents and Staz-on ink. Sign up in our Scrapbooking department today.


Saturday, March 13, 2010

Quilt Week Coming Up!

Join us next week for our annual Quilt Week celebration!
Come see the beautiful quilts on display and take advantage of special deals all week long. You won't want to miss the demos on Saturday, March 20th, going on in every department.

It's not too late to bring a quilt in for display and receive a $10 gift card for participating. The deadline is tonight at closing time (7:00 p.m. Rexburg; 9:00 p.m. Idaho Falls).
See you there!


Thursday, March 11, 2010

New Products from Kaisercraft

We have lots of new products in the store from Kaisercraft including several new paper collections as well as additions to their "Beyond the Page" alterable kits.

Here's a look at some projects designed by Candi McFadden:

This miniature bookshelf was made using the La di da collection. The books are sold separately from the shelf, making for an endless array of possibilities.


Wouldn't this also be cute for baby? You could fill one book with pictures and milestones from 0-3 months, a second book with 4-6 months, etc.


One of my favorite parts of the Peachy Keen line is the embellishment pack. The pearl and fabric designs fit perfectly over the patterned paper, creating a stunning accent! There's also coordinating clear stamps and rub-ons available.

Click here for a free Peachy Keen printable available from Kaisercraft.

Gypsy Sisters features deep purples, pinks, and teals perfect for displaying everyday as well as heritage photos.


Shaken Not Stirred comes in bold and classy reds and blacks that also happen to coincide with many of our local school colors.


Kaisercraft makes memory making so easy, they even list coordinating Bazzill cardstock colors on their website. Just click on the links to the individual collections (above) to find out!

Wednesday, March 10, 2010

Floating Frame Project

This beautiful project, designed by Maureen Wilson, features photos, patterned papers, metal embellishments, and fabric.

This frame has four layers of glass. The first is a protective layer, the second has photos, the third has embellishments, and the fourth has fabric squares. This close up shot might give you a better idea:

To make one of your own, follow these simple steps:

  1. If you want to make a grid like the one shown, cut all your photos, papers, and fabrics to 2 inch squares (or use a 2 inch punch).
  2. Next remove the layers of glass from the frame.
  3. Use a dry erase marker to draw a grid on one sheet of glass. Then layer a sheet of glass on top of it so it’s easy to get perfect placement for all your squares. Attach your photos with glue dots.
  4. Repeat for each layer.
  5. When you’re finished, wash the marker off and use that sheet for the top protective layer.
This floating frame makes an eye catching display and is a beautiful way to showcase your favorite photos.